Is it possible to make something perfectly flat?
Achieving perfect flatness in engineering and manufacturing is a critical aspect, as it ensures the accuracy of measurements and the proper functioning of mechanical systems. The ability to make something perfectly flat is crucial in the manufacturing of semiconductors, optical components, and other precision instruments.
Is Perfect Flatness Possible?
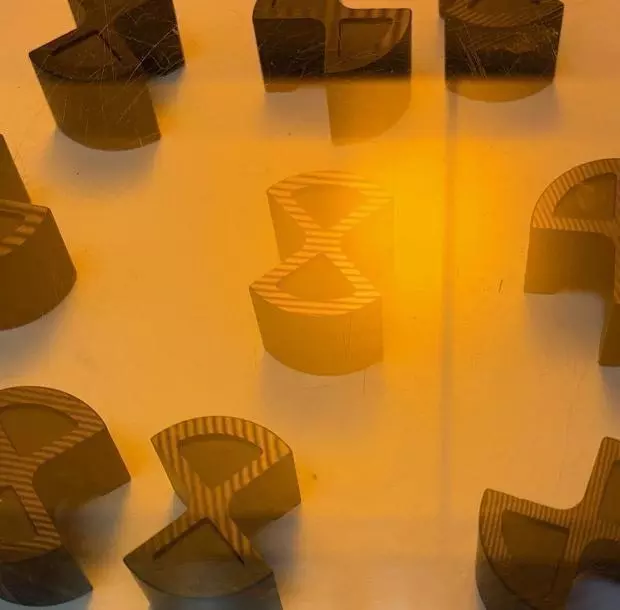
The concept of perfection is difficult to achieve in real-life applications. In theory, perfect flatness can be defined as a surface that has no deviation from a perfect plane. However, in reality, it is nearly impossible to achieve this level of flatness due to several factors such as the inherent irregularity of materials, the limitations of manufacturing processes, and the impact of environmental factors. For example, a surface that appears perfectly flat to the naked eye may still have tiny surface imperfections, which are invisible to the human eye. These imperfections can be measured and quantified using specialised equipment such as surface profilometers, interferometers or by using a monochromatic light source and an optical flat.
A monochromatic light source is a light source that emits only a single wavelength of light. This light source is used in flatness reading because it allows for accurate measurement of the surface's deviations from a perfect plane. An optical flat is a flat piece of glass or other material that has an extremely high degree of flatness. It is placed on top of the surface being measured and acts as a reference surface. When a monochromatic light source is shone through an optical flat and onto the surface being measured, light bands are created. Light bands are a series of bright and dark bands that form due to the interference of the light waves. The distance between these bands indicates the degree of flatness of the surface being measured.
To read the light bands, a monolight is used. It is used to observe the light bands and determine the degree of flatness. The observer moves the monolight across the surface being measured, and the distance between the light bands is measured at different points on the surface. The readings obtained from the light bands are used to calculate the flatness of the surface being measured. Flatness is expressed in terms of the distance between the high and low points on the surface. The smaller this distance, the flatter the surface.
Lapping and Polishing Techniques:
Lapping and polishing are two techniques used to achieve high levels of flatness in precision engineering and manufacturing applications. Lapping involves the use of a hard abrasive material such as diamond or silicon carbide to remove small amounts of material from the surface being lapped. The material is removed by a combination of cutting and rubbing action, which results in a flat and uniform surface.
Polishing involves the use of a soft polishing pad, which is typically made of a material such as polyurethane or felt. The polishing pad is coated with a fine abrasive slurry, and the surface being polished is held against the pad and moved in a circular motion. The abrasive slurry removes the small surface imperfections and produces a smooth and flat surface.
Both lapping and polishing are iterative processes that require multiple stages to achieve the desired level of flatness. The initial stages of lapping and polishing involve the removal of the majority of the surface imperfections, while the later stages focus on achieving the final level of flatness.
The concept of perfect flatness is difficult to achieve in real-life applications. However, by using specialised techniques such as lapping and polishing, high levels of flatness can be achieved, which are sufficient for most precision engineering and manufacturing applications. The accuracy required for a given application determines the degree of flatness required, and the iterative nature of lapping and polishing allows for the gradual improvement of surface flatness.
